Exchange 2013 for Employees

Archive for 2014

Exchange 2013 for Employees

Posted on: No Comments

Faculty/Staff, in an effort to resolve the loading or message not downloading issues that have been reported when using email on a mobile device, we have decided to accelerate our plans on a project to move everyone over to Exchange 2013.  We are making every effort to move all Faculty/Staff mailboxes over to this system before the beginning of next week.

How will this affect me?

You will not have to do anything when we transition your mailbox over to Exchange 2013.  You will still be able to connect the same way that you have in the past and should not see any major changes.  The only thing that you will experience is that you may have to close Outlook or open up the Mail app on your phone to allow it to reconnect to the system.

We will be moving people over in several batches so your account may be transitioned over before someone else in your office, but you will still be able to communicate with them during this process.

New Look for Outlook Web Access (OWA)

We are excited to let you know that your experience on the web interface will be much improved (especially for Mac users).  Once you are moved over to Exchange 2013, you will see the new design when you login to your email from a web browser.  Here are a few quick tips on how to use the new version of OWA:

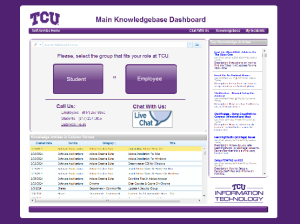
If you have questions about this transition or run into problems, you can always contact the IT Support HelpDesk for assistance.

Mac OS X Yosemite

Posted on: No Comments

Faculty/Staff, Apple recently released its newest operating system named Mac OS X Yosemite for their laptop and desktop computers. While the update from Mavericks (10.9) to Yosemite isn’t expected to be dramatic, IT still needs to test key applications and University systems before installing it on campus machines.  This is a standard process and one that applies to all releases of new operating systems.

Some common software applications have already been reported to have issues with Yosemite and it is customary for vendors to have 60 to 90 days to fully support the release of a new operating system.

Once the new operating system has been tested for compatibility with University technology, then we will send out a message about how to upgrade your Apple computer.  We expect to complete this process and begin support for Yosemite in January of 2015, if not earlier.

While Mac OS X Yosemite is free, we have a process in place that will keep you from being able to perform the upgrade on your own until we have completed the testing phase.  We will reach out with information about how to upgrade your Mac once the Yosemite committee has approved the launch.  If you have any questions, please contact the IT Support HelpDesk at (817) 257-6855.

Back to School Technology Help

Posted on: No Comments

Welcome back to campus and we hope that you have had an eventful summer break.  As always, the summer months bring a lot of change to the campus and we wanted to make you aware of a few IT related issues.

The HelpDesk Has Moved!

As part of the Library renovation project, the IT Support HelpDesk has temporarily moved over to the Carter Technology Center.  This location is in the center of the campus commons and connected to the west end of the Carter Residence Hall.  We are excited that our temporary home will be in the heart of the campus and readily available to residential students.

map

Stop Wasting Time On Hold

We realize that the beginning of school is a busy time and many of you don’t have the time to wait on hold for assistance.   If you call the IT Support HelpDesk and are faced with the decision to stay on hold or hang up, try using our new callback feature.  This option allows you to leave a message and then maintains your position in our queue until an agent becomes available.  Listen to the prompts when you call the HelpDesk to find out how to use this service.

stop

A New Self-Service Experience

This summer the Information Technology division moved to a completely different Incident Management system.  This means that you will have a brand new experience when trying to submit a HelpDesk ticket in myTCU.  Learn more about how to use the system by watching our video tutorial on youtube.

cherwell

­­

Access the IT Knowledgebase

Over the past year we have been transitioning all of our online technical documentation to the IT Knowledgebase.  We have hundreds of articles with helpful information about how to use most of the technical services that we provide to the campus.  Visit our website at https://it.tcu.edu and click on the Knowledgebase link to get access to this tool.

 know

Students – Getting Connected to the TCU Network

Posted on: No Comments

The Information Technology division would like to take this opportunity to welcome our students back to campus and provide you with a few pieces of information about how to connect to the TCU network.

TCU StuWireless Network

You must register each of your devices on the network before you can connect to the Internet.  All you have to do is connect your laptop to the Get Connected wireless network, then open a web browser and go to a non-TCU website.

Keep in mind that mobile devices (i.e. Phones, iPads, and Tablets) have to be manually registered in myTCU from a device that is already connected to the Internet.  Check our Knowledgebase for more information about how to do this.

Warning:  Most wireless printers do not have the capability to connect to a WPA2 Enterprise network so we recommend that you connect them directly to your computer with a USB cable.  Don’t forget that wireless routers are NOT allowed on the TCU network.

TCU Wired Network

Once you plug a desktop/laptop computer into a wired jack in your room all you have to do is open up a web browser and use the setup page to register your device.

Game Consoles, Blu-Ray Players, and Smart TV’s will all need to go on the wired network (i.e. Xbox, PS3, or Wii), and they will have to be manually registered in myTCU from a device that is already connected to the Internet.  Check our Knowledgebase for more information about how to do this.

How do you get help?

We understand that getting connected to the network is an important part of the move-in process and the IT Support HelpDesk will be available for an extended period of time to help you out.

Two Factor Authentication Changes

Posted on: No Comments

Last November, Human Resources and Information Technology introduced a new security feature called “two factor authentication” to myTCU. This is similar to the services that many financial institutions use to verify your identity before allowing you to connect to their online banking resources.

After much feedback on the delivery capabilities of this feature, we are pleased to announce that we have added a voice messaging option that allows you to receive your PIN through a phone call as well as a text message.  We are excited about this change and have plans to roll this tool out to other pages in myTCU in the near future.

2fa

Do not forget to ensure that the home and cell phone numbers that we have on file are up to date.  Missing or incorrect numbers can be added by accessing myTCU from on-campus and clicking on the Employee Center icon.  Please, contact hr2fa@tcu.edu, or call Ext. 6305 with any questions or concerns.

Checkout the New IT Self-Service Tool

Posted on: No Comments

Starting today, you will have a different experience when you use our self-service portal to create a ticket for the Information Technology division. We have recently switched to a new system which has a completely different look and feel. It has dozens of additional features that give you the ability to do things like add attachments and work with hundreds of knowledgebase articles.

Watch the Online Video Tutorial

In order to help make the transition to the new tool a little easier, we have created a quick video tutorial to ensure that you know how to use everything. Take a few minutes to watch the video below and learn more about how this system can enhance your experience.

https://www.youtube.com/watch?v=ci6LeqZ112E

Self-Service

How do I submit a self-service ticket?

You will actually follow the same process that you used when working with our older tool. All you have to do is log into myTCU and click on the HelpDesk ticket icon. The only difference is that you will see a page called TCU Single Sign-on that will ask for your login before giving you access o the system.

Keep in mind that all of your tickets from the other system will not be visible in the new tool, but you can always ask the IT Support HelpDesk to lookup the data for you.

Changes to Outlook Web Access

Posted on: No Comments

To ensure the best user experience, we decided to reschedule the changes to Outlook Web Access (OWA).  These changes are now set to be implemented tonight, June 3rd, at 9pm.  The outage should last for no more than one hour, and during this time access to email will be limited. Once complete, you will start to see the following login page when you visit mobile.tcu.edu to check your email.

image007

Why are we making a change?
These changes are the first step in an upgrade process to our email system.  We are excited about this upgrade and will be sending out additional information in the future to help you prepare for the new web interface. Keep in mind that all we are changing at this point is the landing page when you visit mobile.tcu.edu.  You do not have to do anything differently at this time.  Please, feel free to reach out to the IT Support HelpDesk if you have any questions.

Mac Users – Don’t Forget to Upgrade

Faculty/Staff,

In March, we announced the release of Mavericks (Mac OS 10.9) to the campus community and since then hundreds of faculty/staff have taken the opportunity to update their TCU Mac to Apple’s newest operating system.

We also warned everyone that in late May we would begin pushing this upgrade out to all Macintosh computers to help reduce the support associated with managing multiple operating systems.

The next few weeks are your last opportunity to do this when it is most convenient for you and gives you the chance to plan for the process.  We will send out more details about the forced upgrade later in the month so you are aware of what will happen if you have not completed the following process before May 31st.

How do I start the Mavericks upgrade?
The process is simple, and this document includes step-by-step instructions on how to complete the process on your own.  Please, review the following reminders before opening the attachment.

Here are a few important reminders:

  • This upgrade will take approximately two hours to complete so plan accordingly.
  • We recommend that laptops be connected to power and a wired network connection before starting the upgrade.
  • You will need to have an Apple ID to start the process.  This is the same account that you use for the iTunes Store so you may already have one created.
  • Your machine must already be running Mac OS 10.6.8 or later to be eligible for the upgrade and must meet the minimum requirements.
  • Be prepared to upgrade any specialized third party software that you installed on your machine in case the version that you are running is not compatible with Mavericks.
  • If you currently use iWork and download the free version of the program after you upgrade to Mavericks, then you will find that some of the regular features have been removed by Apple.  We recommend that you continue to use the older versions of iWork until these features are added back to the product.

The IT Support HelpDesk will be more than happy to help answer questions about this change, but the process is easy enough that you should be able to complete the upgrade on your own.

Adobe Creative Cloud Launched to Campus

Posted on: No Comments

Faculty/Staff, we are excited to announce that Adobe Creative Cloud (CC) has been released to the campus.  Please, read the instructions below if you would like to install Adobe CC on your computer.

Note:  You can continue to use Adobe CS6 if you already have it installed on your machine.  The instructions below will install Adobe CC as a separate application so you can continue to use both versions.

Instructions for TCU Owned Machines

  • Windows Users
    Installing Adobe CC on a Windows machine will be easy, but it may take up to 3 hours to complete and requires that you connect your computer to the wired network before starting.  Please, visit the Adobe page for additional information.
  • Mac Users
    Installing Adobe CC on a Macintosh will be easy, but it may take up to 3 hours to complete and requires that you connect your computer to the wired network before starting.  Please, visit the Adobe page for additional information.
  • Getting Adobe CC in a Lab
    We will install Adobe CC on lab machines, but only if it is requested. Please, touch base with your department liaison if this is something that you are interested in.
  • Work-at-Home Licenses for Personal Machines
    Adobe Work-At-Home products are available only for current TCU faculty and staff to use on personally-owned devices. Please, visit the Adobe work-at-home page for additional information.

TCU Personal is Now Available

Posted on: No Comments

Current Faculty/Staff,

The TCU Personal wireless network is now available across campus and you can begin to connect your personal devices.  Please, take a few minutes to review the information below before you begin the on-boarding process.

How do I get connected?
It is extremely important that you review the following documents on how to connect your equipment since support for personal devices is limited.

Reminder about Support
At this time, we do not plan to send consultants out to your office to provide assistance with your personal devices.  You may want to sign-up for one of the following BYOD Workshops if you would like hands-on assistance.  We are offering six workshops in the next few days and you can RSVP by using the link below.
https://it.tcu.edu/events/categories/byod/

New Wireless Network Coming to Campus

Posted on: No Comments

Faculty/Staff,  We are excited to announce that on Wednesday, April 16th we will launch a new network called TCU Personal to the campus community.  This is a BYOD (Bring Your Own Device) network designed to allow current employees to connect their personal devices to the TCU wireless system.  

You will be required to go through an on-boarding process before gaining access to the Internet.  This system will be able to connect Mac OS, Windows, Android, and iOS (iPhone/iPad) devices. Remember that any support from Information Technology for personal devices will be limited since TCU does not own or manage your equipment.

When will we tell you how to connect?

We plan to send out more detailed information about this new network and how to get connected next week.  Please, watch for a series of messages from us on Monday and Tuesday before you contact the HelpDesk with questions.  

We are also hosting an online informational webinar if you are interested in hearing us talk about this new system.  You can RSVP by clicking the link below.  

BYOD – Online Webinar Signup Form

What do you need to do to prepare?

We recommend that you take some time to ensure that your mobile devices are running the most up to date OS and that your laptops have been updated and are running current virus protection.

StuFile Share Changes

Posted on: No Comments

Students, today we will be doing an upgrade to the server that houses the StuFile shares.   These are commonly referred to as the student personal share or U drive which automatically connects when you login to a Windows machine on campus.

This system will be unavailable and will not be back up until Wednesday, March 12th.   You will not lose any data during the upgrade process and everything will work the same when the system comes back online.

New Quota Enforcement
Once the upgrade is complete we will be activating our quota enforcement polices on this system.  We have always had quotas in place on these drives, but until now we have not put enforcement policies in place to ensure that they stay under the maximum size.  From now on, all StuFile shares will be limited to a generous 5GB quota.

If your StuFile share is already over the 5GB quota, you will receive a separate email with information on how these drives will be handled later today.  

What if my share reaches the quota limit in the future?
Once you attempt to add a file to your StuFile share that will put it over quota, you will receive an email indicating why you were unable to copy the file over.  You will also receive emails once your share reaches 90 and 95 percent of your allowed space so you will always know where you stand.

Mavericks Launched to Campus

Posted on: No Comments

Faculty/Staff, the TCU Information Technology division, along with the Mac Committee, have tested and approved the launch of Apple’s newest operating system (Mavericks) to the campus.  You will be able to do the upgrade on your own, and it will be launched to a handful of departments each week until it is available to everyone on campus.

Why should I upgrade now?
In May we will begin pushing this upgrade out to all Macintosh users to help reduce the support associated with having multiple operating systems on campus machines.  This is your opportunity to do this when it is most convenient for you and gives you the chance to plan accordingly.

Upgrading also presents you with a series of enhancements that will help to improve your overall experience.  Check out the latest features on the following website:

http://www.apple.com/osx/whats-new/

How do I upgrade?
We plan to open up the ability to install the upgrade on your own to a handful of departments each week and will have it available to everyone by the end of February.  Your department chair or supervisor will be emailed when Mavericks has been released to your group, and they will be provided with step-by-step instructions about what to do.

The IT Support HelpDesk will be more than happy to help answer questions about this change, but the process is easy enough that you should be able to complete the upgrade on your own.  Keep in mind that the installation takes two hours to complete.

If you have a business reason to upgrade to Mavericks before it is launched to your department, then you can create a request with the IT Support HelpDesk, but you are encouraged to wait until it is launched to your group.

Identity Finder at TCU

Posted on: No Comments

Faculty/Staff, in the summer of 2012, Information Technology pushed Identity Finder out to all TCU owned computers, and we began a two part plan to utilize the tool to locate and remove Sensitive Personal Information (SPI) stored locally on campus machines.

We have now moved to the second part of this implementation which includes having Identity Finder run a scan of your machine in the background and then send a report back to our centralized server.  This will help to ensure that our campus users are keeping their computers free of SPI and doing their part to help protect the university.

What does this mean for me?
Since the Information Technology division has started the second part of this rollout, we have identified a select list of individuals across campus who have an unacceptable quantity of SPI stored on their machines.

If you are part of this group, then an email will be sent to you tomorrow and you will have thirty days to remove/clean the content off of your device as per the TCU SPI policy (https://it.tcu.edu/policies/spi).

How do I keep myself off of this list?
The easy way to clean your machine is to run Identity Finder and address the items that it finds.  Take a few moments and watch the following instructional videos to learn more about how this process works. Please, copy and paste the links into your web browser.

Video for Mac Users


www.youtube.com/watch?v=M7RH1lgctZ8

Video for Windows Users


www.youtube.com/watch?v=paifPxUur6o

Identity Finder FAQ

Welcome Back to Campus

Posted on: No Comments

Welcome back from the holiday break. We hope that you are rested and ready to return to campus. Don’t forget to reach out to the HelpDesk if you have a technical issue but remember that we are extremely busy for the first few weeks of school.

Archived Email Stored on HomeFile

Posted on: No Comments

Faculty/Staff, we hope that you enjoyed your holiday break and want to reach out to those storing archived email on their Homefile share (also called the M: drive or personal share).  If you store archived email on these shares, please review the following information.

What happened?
Before the Thanksgiving break one of our Homefile servers had a system failure.  While the system was restored and back in service shortly after the event, we had several reports of people having trouble with their archived email (or Personal Folder) stored on these shares.  Since this event hit just a single part of the Homefile system it will only affect a limited number of individuals on campus.

What do I need to do?
We are encouraging all users who store archived email on the Homefile system to check to make sure that everything is there and to report problems to the HelpDesk immediately.  We have extended the 30 day backup window on this system to January 13th, 2013 in order to give people more time to report problems with their archived email.  It is very important that you report any issues before that date.

a