Adobe Creative Cloud
Adobe Creative Cloud is a collection of apps and tools that help people edit photos, videos, graphics, and documents.
You may be familiar with some of their more popular tools, such as:
- Acrobat: creating, editing, sharing, and securely managing PDFs
- Dreamweaver: designing, coding and managing websites
- Illustrator: creating icons, illustrations, and vector graphics
- InDesign: designing layouts for books, magazines, and posters
- Photoshop: photo editing, graphic design, and digital art
How to Access Adobe Tools
Types of Access
TCU has two different access routes for Adobe Creative Cloud (CC): Named User License (NUL) and Shared Device License (SDL).
Employees may have either a NUL or SDL depending upon role; read more below.
Students only have access to SDLs. See the SDL tab for more.
A Named User License (NUL) is tied to an individual user, not a specific computer. It allows eligible users to install and use Adobe CC on up to two devices (TCU-owned or personal) by logging in with their TCU credentials. This is useful for faculty (and some staff) who need regular access to Adobe apps across multiple devices, including TCU-owned and personal devices.
A Shared Device License (SDL) allows a user access to Adobe CC on TCU-owned computers, such as those in computer labs, classrooms, conference rooms, and offices. This license is tied to the device, not an individual user, and it is useful for spaces where multiple people use the same computer and software can be pre-installed.
What do I need Adobe CC for?
Not everyone will need an NUL for Adobe CC for basic tasks involving PDFs. Adobe Acrobat Reader has already been pushed out to campus machines, and you can easily open/view PDFs, fill out PDF forms, and sign PDFs with this free version of the software. You do not need Adobe Acrobat Pro in order to do most of the basic things that people use a PDF viewer/reader for.
You may need Adobe CC for work involving creating and editing images, videos, graphics, media, websites, etc. using professional tools.
How do I know what license I have or can get?
Read the other two tabs about NULs and SDLs to learn about each one and which is right for your situation.
What is a NUL?
A Named User License (NUL) is tied to an individual user, not a specific computer. It allows eligible users to install and use Adobe CC on up to two devices (TCU-owned or personal) by logging in with their TCU credentials. This is useful for faculty (and some staff) who need regular access to Adobe apps across multiple devices, including TCU-owned and personal devices.
Who is it for?
- Faculty: NULs are automatically added to current full-time faculty accounts.
- Staff: exempt and non-exempt staff, associates, adjunct faculty, temporary staff employees, and student workers may request a NUL by providing a business case to the IT Help Desk about the software they need.
What else do I need to know?
- You log into Adobe CC with your TCU credentials and need to connect at least once every 99 days to stay active.
- You can install Adobe CC on a personal device, but support for personal devices by the IT Help Desk is limited.
- If you have or are approved for an NUL, you can still use Adobe CC tools with a Shared Device License (SDL) on TCU's campus.
- Work-at-home functionality is to be used solely for employment-related purposes. The software is not owned by the university employee. However, you may purchase a personal subscription of Adobe CC if you have needs that are not work related.
- While you can use the Adobe CC NUL on multiple devices, you can only be logged in on two devices at the same time. To avoid issues when switching between devices, close Adobe apps and log out of Adobe CC before switching.
Where can I learn more?
To learn how to install Adobe CC tools, see the NUL Installation section on this page
and follow the instructions for PC or Mac.
For additional information, explore these links.
What is an SDL?
A Shared Device License (SDL) allows users access to Adobe CC on TCU-owned shared computers, such as those in computer labs, classrooms, and conference rooms. This license is tied to the device, not an individual user, and it is useful for spaces where multiple people use the same computer and software can be pre-installed.
Who is it for?
Anyone with an active TCU account (i.e. all faculty, staff, and students).
What else do I need to know?
The Adobe SDLs are applied to TCU-owned computers in shared spaces (such as computer labs, classrooms, conference rooms, and offices) so that the TCU community has access to Adobe CC tools.
There are two levels of Adobe SDLs. Most computers you will find in computer labs will have Level two access, though a few older computers may only have Level 1 tools.
- Level 1 has Acrobat, Photoshop, Illustrator, InDesign, and Dreamweaver
- Level 2 has all Adobe apps in TCU's license agreement except Adobe Express, Adobe Fresco, Adobe Firefly, Adobe Aero and Photoshop Express
Where can I learn more?
NUL Adobe Installation
These steps are for TCU users with a NUL, see NUL content above.
Step 1: Download
You must have the Adobe CC app installed on your computer to begin. You can download the app by visiting Adobe’s installation site. If you already have this installed you can skip to the next step.
Step 2: Open Adobe CC
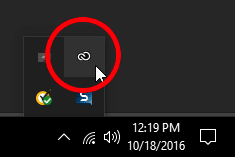
Open the Adobe CC App by clicking on the app menu in the system tray next to your time and selecting the Adobe Creative Cloud app. You can also open your Start Menu and type in Adobe to find the Adobe Creative Cloud application.
Step 3: Enter TCU email

Once open, enter your TCU email address.
Step 4: Choose Company or School Account

Select Company or School Account (if prompted).
Do not select Personal Account as this will not connect to TCU's system to verify your account.
Step 5: Enter Credentials

Enter your TCU username and password.
Step 6: Choose Apps to Install

Once open, click on the apps tab at the top of the window to browse the applications that you can install.
Click the install button and wait for the application to download to your computer.
Step 7: Log Out When Done
To log out of Adobe Creative Cloud, click the blue circle in the top right-hand corner and click log out.
These steps are for TCU users with a NUL, see content above.
Step 1: Download
You must have the Adobe CC app installed on your computer to begin. You can download the app by visiting Adobe’s installation site. If you already have this installed you can skip to the next step.
Step 2: Open Adobe CC
![]()
Open the Adobe CC App by clicking on the menu bar in the top right-hand corner.
Step 3: Enter TCU email
Once open, enter your TCU email address.
Step 4: Choose Company or School Account
Select Company or School Account (if prompted).
Do not select Personal Account as this will not connect to TCU's system to verify your account.
Step 5: Enter Credentials
Enter your TCU username and password.
Step 6: Choose Apps to Install
Once open, click on the apps tab at the top of the window to browse the applications that you can install.
Click the install button and wait for the application to download to your computer.
Step 7: Log Out When Done
To log out of Adobe Creative Cloud, click the blue circle in the top right-hand corner and click log out.